
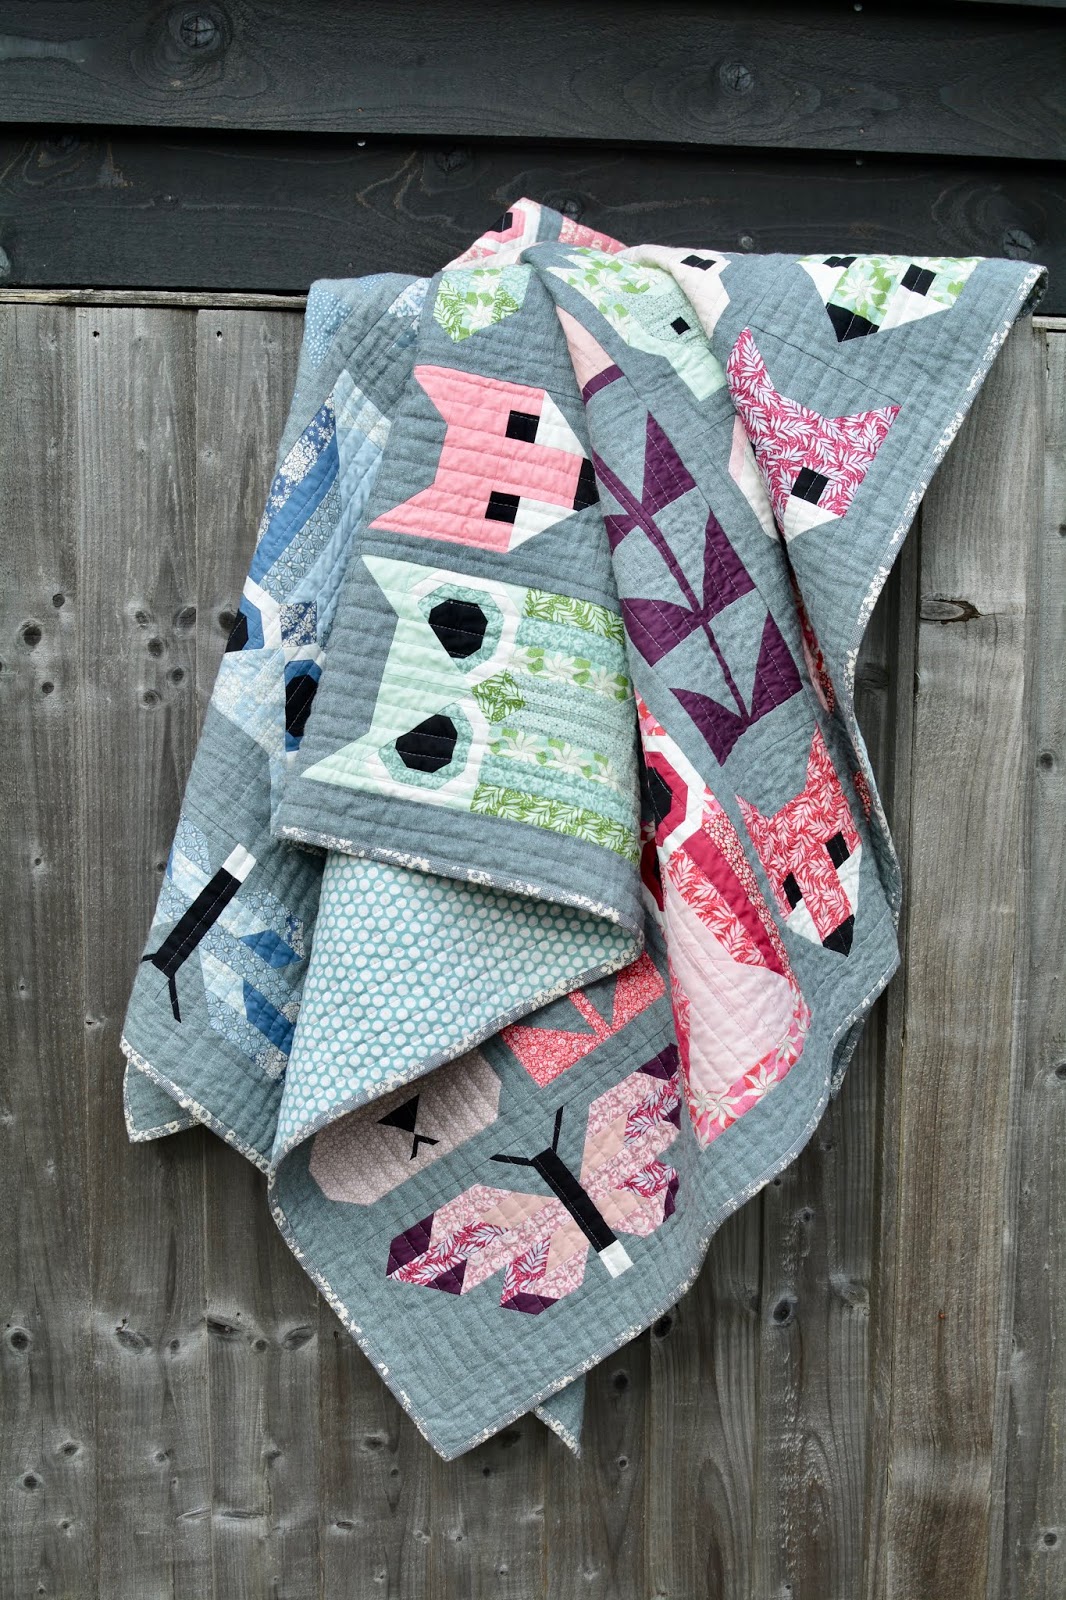
Finished Fancy Forest quilt
Finally, we have sunshine and signs of spring being around the corner. A perfect opportunity to photograph my Fancy Forest quilt outside (it's so big, it is hard to photograph in the house).

I finished this quilt top at the end of June last year and it then sat, neglected on my quilt ladder for several months while I plucked up the nerve to quilt it.
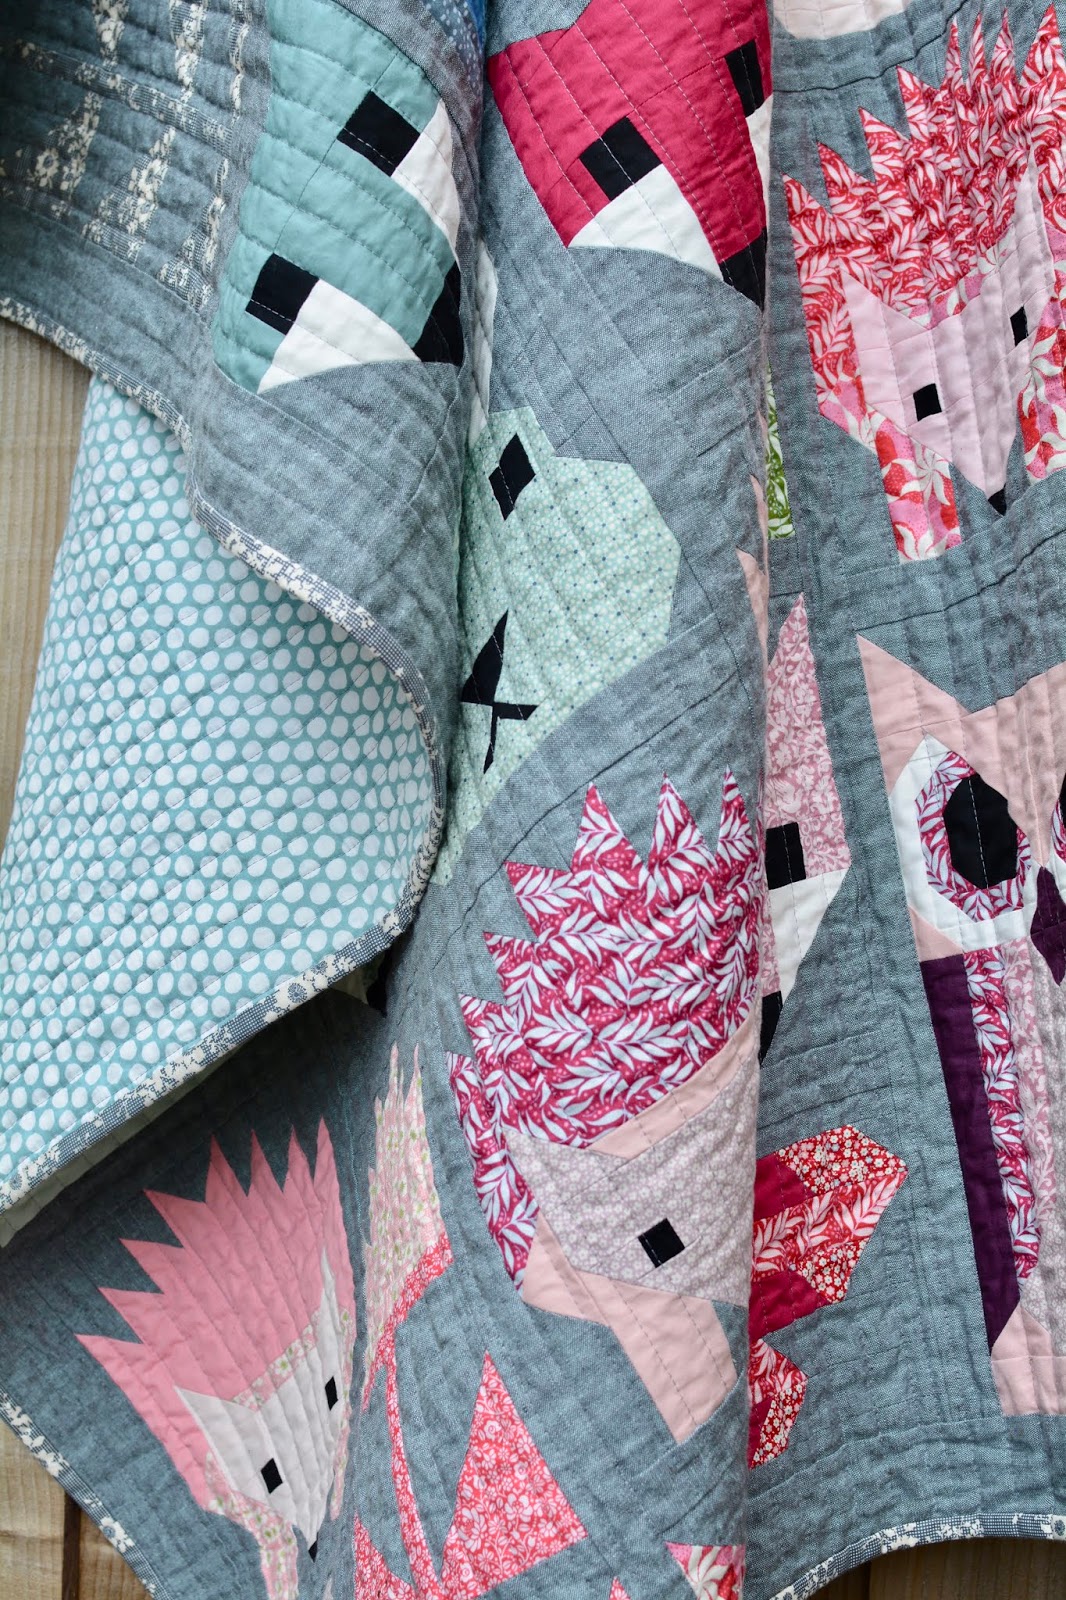
As I mentioned in my previous Fancy Forest blogpost, this quilt is enormous and would have cost a fortune to back in coordinating fabric. In the past, I have bought large Ikea duvet covers and ripped them up to produce two backings which is really cost effective. The problem was that this quilt is too large for a duvet cover. Fortunately, flat sheets come in much larger dimensions (to allow for tucking in and folding over at the top), so I bought a fun spotted sheet which was 100% cotton and very reasonable.
Two weeks before Christmas, I decided to set myself the target of getting it all quilted and bound in time for my family to arrive on Christmas Eve. Not that I had anything else to be getting on with...it seems I quite like working to a deadline and under slight pressure!
I decided fairly early on in the quilt along that I would like to straight line quilt this one - I like the modern look it gives and thought it would be a good match for this quilt. After consulting various other blogs (including those written by Suzy Quilts and Emily Dennis) about straight line quilting, I made a start. The general consensus seems to be to start by stitching lines (always in one direction) at 1 1/2" apart and quilting the whole quilt, and then going back to fill in another line of stitching between each line - the end result being quilting lines 3/4" apart.
I started at the middle of the quilt, along the ditch of a long piece of sashing (with the rest of the right hand side of my quilt rolled up in the neck of my machine) and went from top to bottom. Then I cut my thread, pulled the quilt back through to get to the top again, and repeated that again and again, each time moving towards the right hand side of the quilt top (and the rolled up bulk reducing slightly each time). It is really important to position your machine on a large table (I sew at the dining room table) and have room for the the quilt to fall off the edge of the back of the table and be supported to the left of your machine. Once I had reached the far edge, I rotated my quilt 180 degrees and then worked from the middle to the edge once more.
When I stand back now, I am so pleased with the quilting and the effect that it has. It just goes to show, that the overall effect is what matters and we shouldn't get bogged down with the tiny details or imperfections. I started my first quilting line along an edge of sashing, hoping that that would get me off to a nice straight start. I was using a quide (an unfolded paperclip washi taped to my walking foot!) set at 1 1/2" to help me keep each row straight and parallel to the last. As I have mentioned before, many of my blocks were a bit wonky or not quite the right size, so my finished top was not the perfectly symmetrical, straight, in line grid that it should have been. Therefore, the problem I had was that as I got to edges of owls, or bunny ears, I realised that if I stayed on course, the line would look wonky next to a straight edge, so I tended to gravitate to following the edge of the seams. I think this was the right thing to do, rather than sticking to my perfect 1 1/2" spacing - but it meant that I ran into the odd difficulty when quilting the second set of lines... There were times that the lines got too close together - so I just stopped halfway down - which sounds like a complete bodge job, but now it is all finished, I can't find where those disaster bits are!
I used a grey Aurifil 50wt thread (colour 2605) for the quilting and most of the piecing, which blended so well into the Essex yarn dyed linen.
After a bit of deliberation about fabric choice for the binding, my mother-in-law helped me choose the gorgeous grey-navy Tilda fabric that I had also used in the quilt blocks. It works so well at bringing it all together, I'm delighted with it.


It seemed that setting myself the tight deadline worked a treat too - I managed to quilt it in several days and then took another couple of evenings to hand sew the binding to the back before putting it on the guest bed in time for my sister's arrival. It has since become a firm favourite for curling up on the sofa for family movie afternoons - it's so big, all four of us snuggle under it comfortably.
Finally, I embroidered a little label for the back.

If you fancy having a go at this quilt, pop over to Olive and Flo Handcraft to look for the pattern, plus Saira has a huge variety of Essex yarn dyed linens that are perfect backgrounds for Elizabeth Hartman's patterns.
As I mentioned in my previous Fancy Forest blogpost, this quilt is enormous and would have cost a fortune to back in coordinating fabric. In the past, I have bought large Ikea duvet covers and ripped them up to produce two backings which is really cost effective. The problem was that this quilt is too large for a duvet cover. Fortunately, flat sheets come in much larger dimensions (to allow for tucking in and folding over at the top), so I bought a fun spotted sheet which was 100% cotton and very reasonable.
Two weeks before Christmas, I decided to set myself the target of getting it all quilted and bound in time for my family to arrive on Christmas Eve. Not that I had anything else to be getting on with...it seems I quite like working to a deadline and under slight pressure!
I decided fairly early on in the quilt along that I would like to straight line quilt this one - I like the modern look it gives and thought it would be a good match for this quilt. After consulting various other blogs (including those written by Suzy Quilts and Emily Dennis) about straight line quilting, I made a start. The general consensus seems to be to start by stitching lines (always in one direction) at 1 1/2" apart and quilting the whole quilt, and then going back to fill in another line of stitching between each line - the end result being quilting lines 3/4" apart.
I started at the middle of the quilt, along the ditch of a long piece of sashing (with the rest of the right hand side of my quilt rolled up in the neck of my machine) and went from top to bottom. Then I cut my thread, pulled the quilt back through to get to the top again, and repeated that again and again, each time moving towards the right hand side of the quilt top (and the rolled up bulk reducing slightly each time). It is really important to position your machine on a large table (I sew at the dining room table) and have room for the the quilt to fall off the edge of the back of the table and be supported to the left of your machine. Once I had reached the far edge, I rotated my quilt 180 degrees and then worked from the middle to the edge once more.
When I stand back now, I am so pleased with the quilting and the effect that it has. It just goes to show, that the overall effect is what matters and we shouldn't get bogged down with the tiny details or imperfections. I started my first quilting line along an edge of sashing, hoping that that would get me off to a nice straight start. I was using a quide (an unfolded paperclip washi taped to my walking foot!) set at 1 1/2" to help me keep each row straight and parallel to the last. As I have mentioned before, many of my blocks were a bit wonky or not quite the right size, so my finished top was not the perfectly symmetrical, straight, in line grid that it should have been. Therefore, the problem I had was that as I got to edges of owls, or bunny ears, I realised that if I stayed on course, the line would look wonky next to a straight edge, so I tended to gravitate to following the edge of the seams. I think this was the right thing to do, rather than sticking to my perfect 1 1/2" spacing - but it meant that I ran into the odd difficulty when quilting the second set of lines... There were times that the lines got too close together - so I just stopped halfway down - which sounds like a complete bodge job, but now it is all finished, I can't find where those disaster bits are!
I used a grey Aurifil 50wt thread (colour 2605) for the quilting and most of the piecing, which blended so well into the Essex yarn dyed linen.
After a bit of deliberation about fabric choice for the binding, my mother-in-law helped me choose the gorgeous grey-navy Tilda fabric that I had also used in the quilt blocks. It works so well at bringing it all together, I'm delighted with it.
It seemed that setting myself the tight deadline worked a treat too - I managed to quilt it in several days and then took another couple of evenings to hand sew the binding to the back before putting it on the guest bed in time for my sister's arrival. It has since become a firm favourite for curling up on the sofa for family movie afternoons - it's so big, all four of us snuggle under it comfortably.
Finally, I embroidered a little label for the back.
If you fancy having a go at this quilt, pop over to Olive and Flo Handcraft to look for the pattern, plus Saira has a huge variety of Essex yarn dyed linens that are perfect backgrounds for Elizabeth Hartman's patterns.


Comments
Post a Comment